

Removing the bumper of the 2012 3rd gen Prius is pretty straight forward, just remove all the screws, clips and bolts securing the bumper onto the frame. Unlike the RSX, the Prius has a total of 26-27 screws, bolts and clips to remove vs. the 11 clips and screws the RSX had (if I remember correctly). Most of the screws are located below the bumper and on top of the bumper with special attention paid to the top part of the bumper because it contains a lot of hidden clips and bolts.
Start by parking your Prius in the shades. The entire bumper removal process, if it’s your first time, will take about 30 minutes.

Click to enlarge image.
Next, remove a 10mm bolt-screw and a panel clip on the bottom of the bumper, right beneath the daytime running light and signal lens combination unit. Do this for both the driver and passenger sides.

Click to enlarge image.
Once this step is completed, you should have removed two of the following pieces, 4 total:

Click to enlarge image.
Next, dislodge the lower bumper cover from the bottom of the bumper and leave it hanging. Do this for both the driver and passenger sides. The back-end of the cover is riveted onto the under engine guard shield.

Click to enlarge image.
Next remove the 10mm bolt-screw and T-clip on the sides of your front bumper, right along the front wheel well.

Click to enlarge image.
The T-Clip needs to be twisted from its native 90-degree to 180-degree and carefully pulled out. Do this for both driver and passenger sides. Once you’ve completed this step, you should have another 4 sets of screws/clips removed, 2 of each type (8 total removed so far):

Click to enlarge image.
Next remove four 10mm bolt-screw along the bottom of the front bumper, right beneath the radiator grille. Remove the clip at the center, between the four 10mm bolt-screws. You may need to use an angled flathead screw driver to pop it off since it sits inside a rather deep crevice. By now, you should have 5 additional screws/clips (13 total removed so far):

Click to enlarge image.
Next, we’ll remove the bolts and clips from the top, securing the bumper to the radiator frame.

Click to enlarge image.
The first thing to do is remove the clips securing the plastic cover that overlays the front bumper. There are three of these clips but you really only need to remove the two outer clips, not the center one. And to get them out, you need to wedge in a micro flathead screwdriver (or something really flat and thin), and pop it off like you would any other clips (15 total removed):

Click to enlarge image.
Once the two cap clips are removed, carefully lift the plastic piece to reveal additional bolts and clips. Take note on how the plastic cover has a plastic extension that goes underneath the front bumper upper lid:

Click to enlarge image.
Now start unclipping and unbolting:

Click to enlarge image.

Click to enlarge image.

Click to enlarge image.
By now, you should have removed 9 additional clips and two 10mm bolt-screws for a total of 26 clips and bolts combined. Now we can remove the bumper. Carefully grab the side of the fender and pull outward with gentle force:

Click to enlarge image.
Notice that the side of the bumper is clipped into the fender by three grooves. The arrows indicates where the grooves are. Do the same for the opposite bumper side. Once both sides have been dislodged from the fender, carefully pull the bumper outward and set it on the ground. I recommend laying the ground with shop towels or spare shower towels to protect the bottom of your Prius front bumper. If you’re extremely careful, you can just set it on the ground:

Click to enlarge image.
Next, disconnect the daytime running light and signal lens combination plug from the main vehicle wire harness. This is right behind the daytime running light/signal combination unit on the driver side. To remove, just squeeze the contact clip on the plug and pull out:
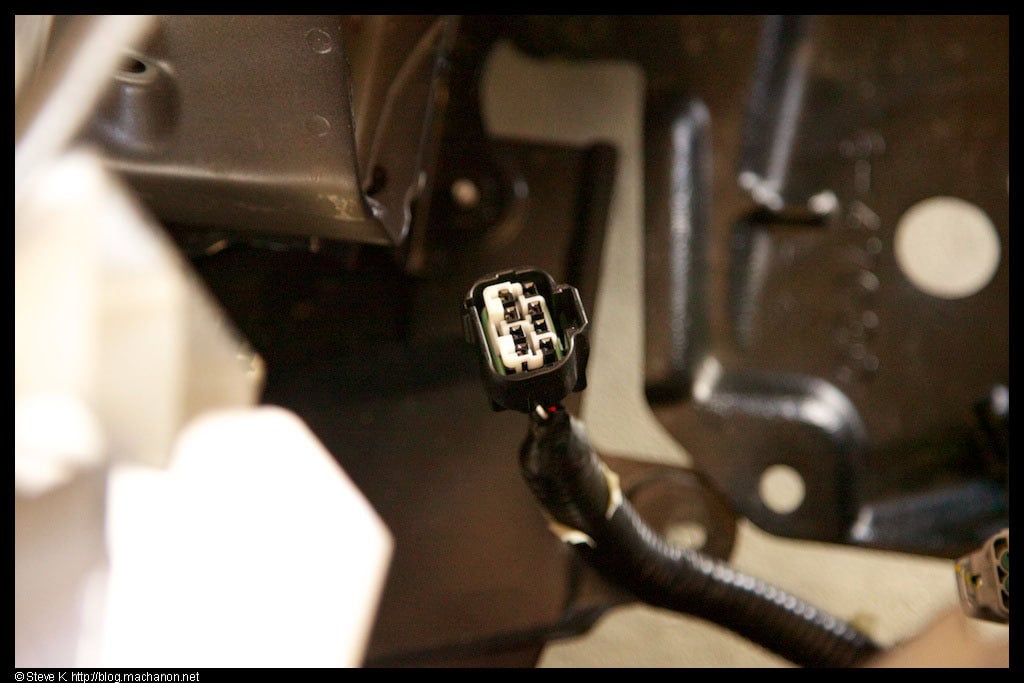
Click to enlarge image.
Now you can pull the front bumper out and set it aside:

Click to enlarge image.
Backside of the front bumper:

Click to enlarge image.
Bumper completely off:

Click to enlarge image.
Installing the bumper is essentially the reversal of removing. Start by pushing the sides of the bumper back into the front fenders, then secure all the bolts and screws starting with the top of the bumper, working down to the sides, the front bottom below the radiator and finally the side under covers.