
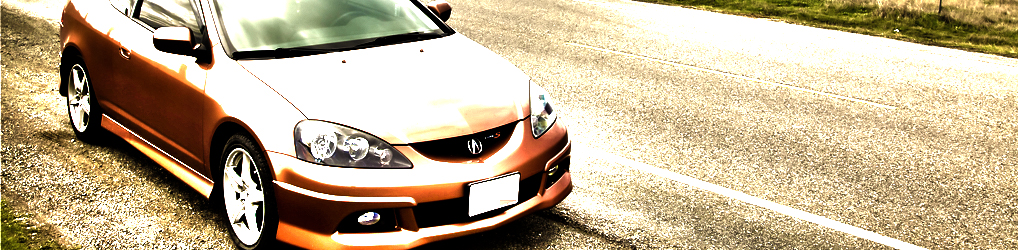
Let’s start the New Year with another DIY guide for the Acura RSX. Here’s another exhumed classic DIY for the 2005-2006 Acura RSX back by popular demand. This DIY installation guide completes the 3-part 2005-2006 Acura RSX OEM A-Spec underbody spoiler installation guide I’ve written. To see the other guides in the series, just type in “OEM A-Spec” on the search bar above.
Allow up to 2 hours for this DIY if you are doing it solo; about 1 and a half hour if you have an assistant.
Check the included parts and make sure everything is in-tact:

5 Stepped bolts

2 Bolts

3 Square bolts

7 Flange nuts, 7mm

3 Flange nuts, 4mm

1 template

1 Rear under body spoiler
I. Removing the rear bumper
Remove the rear bumper by unscrewing a total of 6 self-tapping screws located along the bumper side of the wheel well; 3 screws per side. In reality, only 4 self-tapping screws secures the bumper onto the body. If you have mud guards, there are two additional screws per side: one along the bumper side of the wheel well and a lone screw securing the mud guard onto the inner body frame. Assuming you do not have mud guards, the yellow arrows point to the location of the screws.

Pop the two retainer clips from the bottom of the bumper using a flat head screw driver:

Once all the clips and screws are removed, set them aside and then gently, but with force, pull the rear bumper away from the body and towards you. Start by loosening the rear bumper from both side of the wheel wells, then move your way towards the back. If you’ve removed the front bumper before, the process is very similar:

After removing the bumper, gently set it on the ground:

Detach the license plate light plug from its socket:

II. Installing the rear lip spoiler
Place a large shop towel or a blanket that you no longer use on the ground so you don’t scratch your bumper and rotate the bumper upside down on the blanket. Now is the time to scrub and clean your bumper. Take a wet terry cloth and wipe the bumper down, clean of dust and other blemishes. Then dry it completely with a microfiber cloth. This is necessary when it is time to remove the double sided tape and finalize the install process.
Take the template and affix it to the bumper with tapes, aligning the marker on the template to the dimple that’s adjacent and to the side of the exhaust inlet:

Close-up of the template alignment:

Take a felt-tip pen (I used a Sharpie) and trace the template from the inner side:

Then take a hack saw and saw along the line you’ve just traced:

It’s easier than you think if you use long strokes:

The cut does not have to be perfect as the lip spoiler will be covering it. The purpose of this step is to enlarge the exhaust inlet so that the expanded exhaust inlet from the rear lip spoiler will fit snug. I’ve heard of people claiming that they skipped this step at the expense of the exhaust tip hitting the rear lip spoiler exhaust inlet, but from the way things are made, I don’t see how it’s even possible.
Flip the bumper over and look at your license plate from the inside (inside meaning the unpainted side). Right below the license plate, located on the black “rubber” strip, you’ll see 3 marks. Be sure to pay attention to the set of 3 marks that is CLOSEST to your license plate. There’s another set of 3 marks located about half an inch further down. Ignore that set:

Another shot of the marks:

Take a 5mm drill bit and drill through the center of each mark, then finish off with a 10mm bit. It’s important to first drill with a 5mm bit to ensure the accuracy of the position of the holes:

What the drilled holes look like from the exterior:

Rotate your bumper upside down again and drill through the 5 dimples located along the bottom edge of the bumper, using the same process illustrated in the previous step (5mm->10mm):


Install the 3 square bolts onto the corresponding slots on the rear lip spoiler. You can find these slots on the inside area of the rear lip spoiler that wraps around the lower part of the license plate holder on the rear bumper. Carefully overlay the lip spoiler onto the bumper.
Carefully peel about 1” from each of the double sided tape strippings located on the inside of the rear lip spoiler, then tape the red adhesive backing onto the painted side of the rear lip spoiler. There should be a total of 6 double sided tape strippings.
Push the square bolts from the rear lip spoiler through the 3 holes you’ve drilled earlier, then secure the 3 (4mm) flange nuts onto the 3 square bolts, effectively securing the upper segment of the rear lip spoiler onto the rear bumper.

Drill through the center of the end brackets as there are no dimples marking the drill location.

Secure the bottom of the rear lip spoiler onto the bumper using the 5 stepped bolts and 5 of 7, 6mm flange nuts:

Secure the bolts onto the end brackets of the lip spoiler using the remaining two 6mm flange nuts:

Re-install the 4 self-tapping screws you’ve removed from the very first step, securing the rear lip onto the wheel well edge side of the rear bumper. Remove the red adhesive backings along the rear lip spoiler, pressing firmly while removing.
Re-install the bumper with the remaining two self-tapping screws and two clips.
Since I’ve had many problems with Acura’s lame double sided tapes in the past for not sticking, I was prepared this time. I purchased a roll of .50” x 60” 3M automotive body molding double sided tape from AutoZone just in case, and yup:

Freakin’ gaps because the double sided tape did not want to stick. What I did was partially remove the rear lip spoiler by unscrewing the two side self-tapping screws (along the wheel well side of the rear bumper) and the end bolt underneath the bumper that’s securing the rear lip spoiler on the the bumper, then gently pry out the lip spoiler to access the defunct double sided tape. It took about 3 min to scrape the factory tape off the foam topper on the lip spoiler with my fingernail, about 1 foot in length per side – yes, both sides closest to the wheel well were not sticking. I applied the 3M tape (about $7.00 for a 5ft roll) I bought from AutoZone, allowed it to “cure” for about 30 mins and then reattach the rear lip spoiler onto the bumper:

Alternatively, you can get a piece of solid tube (e.g. vitamin tablet container) that is short enough to fit in between the chassis and rear bumper, but long enough to exert a “push” on the concaved part of the rear bumper. This will cause the gap to temporarily disappear while at the same time, the tube will push the concaved part of the rear bumper firmly against the rear lip spoiler. Leave it overnight and it should stick like glue. I did this along with replacing the stock outer double sided tape to ensure maximum adhesion.
The finished product:

Post you comments or questions below.
Do you have the part # for the step and square bolts? Thank you
Unfortunately no part #’s were provided for the hardware components.
Their is some still available
Very nice writeup!! Could you possibly give me the part number to the rear lip?
Sorry, I don’t have the part number anymore. This item has been discontinued by Honda some time in 2008. You can find plenty of quality replicas though.
They still sale them
Nice write-up. Will the mud guards fit on the lip?
OEM mud guards will not fit unfortunately. You could probably modify it to fit, but probably not worth the effort IMO.