
This is a simple DIY guide on how to design and create your very own custom JDM badge/mark. But before we dive into badge creation, let’s get into a short history of what they mean.
In Japan, “leaf” pictograms in the form of magnetic or suction badges convey different caution messages and are displayed at the rear of the vehicle when the driver meets certain criteria. They are just two of many available automotive pictogram badges available in Japan.
The green leaf badge, also known as the “shoshinsha” badge, is required to be displayed on the vehicle of a newly licensed driver for one year after the driver received his or her license. It’s a visual caution to other drivers on the road that the driver sporting the “shoshinsha” badge is a newly licensed driver and may not be as skillful. Analogically, it represents a new leaf sprout – just like the new driver.

Magnetic JDM badges in native packaging
The other badge/mark is the “koreisha” badge, or autumn leaf badge aka “tear drop badge”. It is recommended to be displayed on vehicles driven by drivers who are 70 years or older. Analogically, it represents a fallen autumn leaf, and designates an elder driver in the vehicle. Drivers should exercise caution around elderly drivers as their reaction may not be as quick as younger drivers.
The purpose of these badges is similar to the familiar diamond shape “Baby on Board” badge that is common place in the USA.

Baby on Board badge
These two “leaf” badges are synonymous with the JDM tuner subculture and lose their actual meanings when displayed on vehicles in countries outside of Japan. They are popularly displayed as decorations or personal expressions.
Parts Needed
- 1x Small suction cup with mushroom head (find a solid white cup if you want an “authentic” looking badge)
- 1x Laminating machine
- 2x Laminating sheets
- Image editing software (I use Adobe Illustrator)
- 1x Scissors
- 1x high quality color printer
- 1x glue stick
- 1x hand held hole punch
Step 1
First of all, download the template(s) I’ve created by clicking on the corresponding badge of your choice:

JDM style Koreisha badge template

JDM style Shoshinsha badge template
These templates are scaled to actual size and printed on US Letter format (8.5″ x 11″). If you set your page settings to US Letter format and load the PDF (or 8.5″ wide), you will not have any problems.
Step 2
Design and create your badge in your favorite image editing software. I use Adobe Illustrator and work with vector graphics so that the images printed are always sharp and clear:

Designing a custom tear drop JDM style badge
Step 3
Depending on your skill level, you can mask out the main white area on the templates or lasso select the main white area and “paste in place” your design. This is all subjective to the software you are using as well as your skill level.
If you are going to make a badge that has a color palette of only up to sixteen colors, such as a flag, download a high-res version of the image from the internet. Wikipedia is a good place to start for flags. It’s best to convert the image into vector format. In Adobe Illustrator, just use the Live Trace command and select six or sixteen colors, depending on the color swatch of your image. Here, I am creating a custom badge base on my alma mater’s logo:

Custom JDM Koreisha style badge
Here’s a demonstration of creating a flag badge (Philippines), another popular trend in the JDM subculture, using Photoshop CS5. I created this badge for the lady, who happens to be Filipina herself:

Creating a custom JDM shoshinsha style flag badge from Photoshop

The flag of the Philippines is used as a demo and the flag image was acquired from Wikipedia

JDM shoshinsha style Filipino flag badge created from available template and ready for print

Step 4
Once you are pleased with your design, print two copies of it. The template is scaled to “US Letter” size, 8.5″ x 11.0″, so select Letter as the printing preset on your printer’s print dialogue window. Print two copies of your design. If you can, print your designs on a laser printer for maximum clarity:

Custom JDM Koreisha style badge
We print two copies to create a double sided badge. This is necessary because over time under the sun, the badge will fade. To correct this on the fly instead of creating a new badge, you just remove the suction cup, flip the badge over and re-install the suction cup. As a matter of fact, you can print two different designs if you prefer.
Step 5
Next, use a pair of scissors to carefully hand cut each badge along the light gray dotted outline on each print.

Custom JDM Koreisha style badge
Step 6
Use your glue stick to glue the two prints together. You don’t need to lather the prints with glue stick adhesive, just spot gluing is fine. The lamination will hold the two badges together. Once both badge prints are glued together, use your scissors to trim out any uneven edges.

Custom JDM Koreisha style badge
Step 7
Warm up the lamination machine per machine instruction and laminate the badge you’ve printed. Ensure the machine is thoroughly warmed before proceeding, otherwise the sheets may not adhere or adhere partially with trapped air bubbles.
Custom JDM koreisha (“tear drop”) style badge laminated
Step 8
Cut the laminated badge with a pair of sharp scissor along the edge about 10 mm away from the actual badge using the cut-out template of your choice as a guide.
Custom JDM koreisha (“tear drop”) style badge cut and trimmed
Step 9
Punch a small hole at the mounting location and insert the mushroom head of your suction cup through the hole. Enjoy your custom designed badge and sport it proudly!
Custom JDM koreisha (“tear drop”) style badge
I didn’t have access to a hand held hole puncher at the time I created this custom Cal Poly Pomona Koreisha style badge, so I used a 3-hole punch in lieu and overshot the suction tab by a few millimeters.
To fix this, I snipped off the suction tab completely and hole punched at the tip of the badge instead and it works like a charm.
Finished custom JDM koreisha (“tear drop”) style badge
Conclusion
If you don’t have the means and want a custom badge created, I can help you create one. Use the contact form to contact me for more details.
 style badge in action")
DIY custom JDM Koreisha (“tear drop”) style badge in action
Don’t stop just yet. Play around with the templates. Using the template of your preference, design your own JDM style badge and have it turned into a vinyl decal, a static cling decal or even have it printed on a flexible magnetic material and display it on the trunk of your car. The possibilities are endless!
Finally, I’m currently creating the template for the new Koreisha style badge:
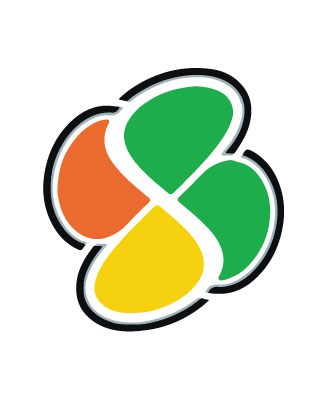 From what I understand, the new Koreisha mark was created to replace the original autumn leaf “tear drop” badge due to the “offensive” connotation of the original design. Apparently, the colors yellow and orange on the “tear drop” leaf pictogram symbolizes death and decay on an autumn leaf. Some translate this symbolism directly to elderly drivers. Adding a little bit of green appear to have suppressed the overbearing orange-yellow mark of “death”. Your take?