

Before you proceed with this maintenance procedure, make sure you have access to a flat and level surface area. You will also need four jack stands to lift your entire car up so that it is level and parallel to the ground. To ensure your car is leveled, use a leveling tool and place it on the side skirt with your driver side door open. The bubble on the leveling tool should be as close to the center as possible. You need to do this to ensure that the automatic transmission fluid is drained completely and sufficiently filled. If you jack just the front of the car up, or if your car is incorrectly leveled, the car will be in an angled position and you will not get an accurate reading on the correct fluid to add.
Toyota recommends inspecting the transmission fluid every 30,000 miles and complete drain and replace every 100,000 miles. So I’m 20,000 miles late to the game. Some folks drive their Prius up to 150,000 miles without changing the automatic transmission fluid and their car still drive perfectly fine. While I believe Toyota’s World Standard automatic transmission fluid lasts a very, very long time (lifetime of vehicle, according to Toyota), it is still a fluid and fluid eventually breaks down.
My local Toyota service center charges $299.95 for this procedure. If you do it yourself, material cost is about $30.00 ~ $40.00 for four pack of 1 quart bottles of Toyota’s Automatic Transmission Fluid World Standard (ATF WS), depending on where you acquire them. In addition, you’ll need a 3-ton rated hydraulic floor jack, 2 pair of 3-ton rated jack stands, an 18″ or longer breaker bar with a 10 mm hex bit (just in case the filler and drainage plug is hard to remove), a funnel, a click torque wrench and a three feet long 1/2″ diameter hose. A creeper will also make the job easier and keep your back clean. Most of these items should already be in your tool set, but if not, consider this as an opportunity to build up your DIY tool arsenal. Since you will be working underneath your car, invest in some good quality tools. Never skimp on safety just to save a few bucks.
The entire automatic transmission fluid exchange process takes about 45 minutes of your time.
Tools and Materials Needed
- 10 mm hexagonal socket wrench or a 10 mm hexagonal bit and matching socket drive (generally, 18″ and longer breaker bars are available with 1/2″ drive and 10 mm hexagonal bits are available with 3/8″ drive. Therefore, you may need a 1/2″ female & 3/8″ male adapter for your breaker bar as I did). Note: I used an 18″ breaker bar because the longer handle allows for extra torque advantage to remove stubbornly tight plugs. This may not be your case.
- 10 mm socket
- Ratchet
- Torque wrench
- 1/2″ diameter hose, at least 3 feet long
- 4-pack of 1 quart bottles of Toyota Automatic Transmission Fluid World Standard (ATF WS)
- 2 pair of 3-ton rated jack stands
- 2 Toyota transfer case gaskets, crush washers – part #: 90430-A0003 (new) / 90430-18008 (old) — optional
- Funnel
- 1 3-ton rated hydraulic floor jack
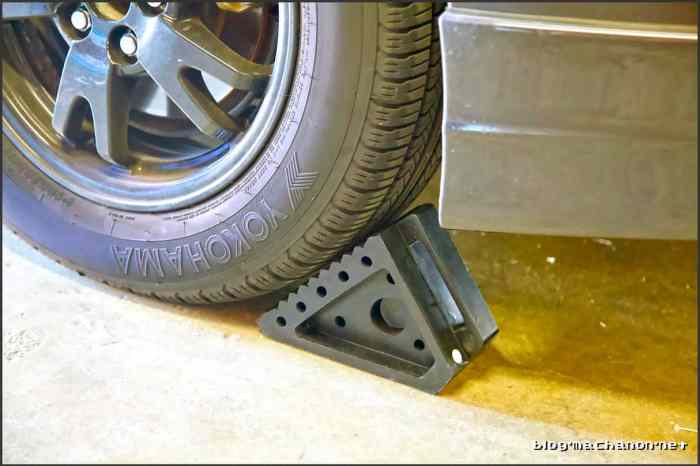
- 1 pair of wheel chocks
- 1 motor oil drain pan
Removing the Engine Under Cover
Because you’ll be working underneath your car, safety goggles are an absolute necessity. Do not attempt unless you are wearing a pair.
Working on a flat and level surface, place wheel chocks on the rear wheels and then jack up the front of the car. Place a jack stand on each front jack support on the chassis.

In order to access the automatic transmission fluid fill and drain plugs, you’ll need to remove the engine under cover. This involves removing six 10 mm bolts and 13 push-pin retainer clips. If the clips are worn and brittle, this would be a good time to replace them.


Removing both clips and bolts should take you approximately 15 minutes if it is your first time and subsequently quicker. This is what the cover looks like and where the bolts (yellow) and clips (red) are located to visually help you expedite the removal process:

Since removing the engine under cover is an involved procedure in itself, you might want to consider performing these maintenance service at the same time if possible:
- Inverter coolant exchange
- Engine coolant exchange
- Automatic transmission fluid exchange WS
- Replacing the positive crankcase ventilation valve (PCV)
Doing all aforementioned services together should take you approximately 3 hours.
Exchanging the Automatic Transmission Fluid
Believe it or not, the hardest part of this maintenance procedure is done. The following steps should take you approximately 20 minutes.
Step 1
Jack up the rear of the car and place a jack stand on each jack support on the chassis, ensuring the jack stands are the same height as the front and the car is completely leveled.

Use a leveling tool, such as [amazon_link id=”B000BQR7TU” target=”_blank” ]Stanley 43-511 Magnetic Shock Resistant Torpedo Level[/amazon_link], for verification. Place the leveling tool on the front door jambs for visual confirmation.
Step 2
Using a creeper (optional, if you want to keep your back clean), slide underneath the car along the passenger side and identify the filler plug and the drainer plug:
The filler plug is located right behind the passenger side axle while the drain plug is located right beneath it. Both plugs are 10 mm Allen hex bolts and installed parallel to the axle, so you can’t miss them.

There is another hex bolt located perpendicular to the axle. This is the inverter coolant drain plug. Do NOT unbolt this hex bolt.
Step 3
Attach the 10 mm hexagonal bit onto your ratchet, or breaker bar if needed, and remove the filler plug first. I had to use an 18″ breaker bar and yank the bar pretty hard to release both bolts:

Set the hex bolt aside and discard gasket.

You want to unbolt the filler plug first to make sure that it can be removed. If you remove the drain plug first and drained the transmission fluid only to not be able to remove the filler plug (seized, stripped thread, etc), your Prius will be immobilized with no transmission fluid and will need to be towed.
Step 4
Place a drain pan underneath the transmission and slowly unbolt the drain plug. Be sure to place your drain pan beneath the black bar sitting in front of the 10 mm drain hex plug. The old transmission fluid will shoot out and hit this bar, changing the trajectory of the exiting liquid. If the drain pan is not positioned correctly, you’ll have an oily mess on your hands – nothing that cannot be wiped up with [amazon_link id=”B00004TBJD” target=”_blank” ]Scott Shop Towels[/amazon_link].

Discard gasket and allow the transmission fluid to drain completely, about 10 minutes.

Step 5
Once the old transmission fluid is completely drained, place a new gasket over the drain plug and tighten it back onto the transmission. Since the gaskets are made of pure aluminum without nylon coating, this step is optional if the original gasket is undamaged. I changed mine since the gasket is so inexpensive and you only have to do this service every so often.

Torque spec: 39 N·m (398 kgf·cm, 29 ft·lbf)
Step 6
Route a 1/2″ diameter hose from the engine bay down through to the transmission and insert the other end into the transmission filler hole, making sure the hose isn’t kinked on its way into the filler hole. The best area to route the hose from the engine bay is directly behind the plastic cylinder cover, behind and beneath the window cowl:


Attach a funnel into the end of the hose that is in the engine bay and pour three 1 quart bottles of [amazon_link id=”B00CTUSEMU” target=”_blank” ]Toyota Automatic Transmission Fluid World Standard[/amazon_link]. To avoid spillage, make sure the funnel spout is snugly attached to the hose. Toyota recommends that you fill the transmission with automatic transmission fluid until the fluid level is between 0 mm (at level with filler hole) up to 10 mm from the filler hole:
If your Prius is correctly leveled, you won’t have to worry about over filling or under filling.
The first three bottles should empty quickly, less than a minute per bottle. Pour the volume of the 4th bottle slowly until you’ve emptied close to half of the bottle. Alternatively, you can pour the bottle into a 1 quart measuring cup with a spout for exact measurement.

As the 4th bottle of ATF-WS reaches half empty, repeatedly take a peek at the transmission filler hole and continue to slowly pour into the funnel until you start to see transmission fluid leaking out of the filler hole. If you have a helping hand, have him or her observe the filler hole for leakage while you continue to slowly pour the automatic transmission fluid into the funnel.
You’ll use up 3.5 quarts, about 3 and a half bottles, depending how level your car is.
Alternatively, you can use a fluid transfer siphon pump in which you’d hand pump the automatic transmission fluid from its 1 quart bottle and directly into the fill hole. You’ll need to be underneath your car to do this and use manual labor to transfer the liquid.
I don’t recommend this method unless you’ve lifted your Prius using a hydraulic lift at a shop because it adds an additional layer of unnecessary labor and time and can create quite a mess. Plus you’d need to transfer residual automatic transmission fluid in-between each empty quart bottle that the transfer pump couldn’t reach if you don’t want to open up a 5th quart bottle of automatic transmission fluid.
Step 7
Once the new transmission fluid begins to leak out of the filler hole, stop pouring. Allow excess transmission fluid to leak out until it no longer leaks and is level with the filler hole:

Stick your pinky finger into the filler hole to ensure adequate transmission fluid level – small amount of transmission fluid should leak out of the filler hole if you swish your pinky finger around.
Install the filler plug with a new gasket and tighten. If using a torque wrench, torque to 39 N·m (398 kgf·cm, 29 ft·lbf). Wipe any leaked transmission fluid off with a shop towel.
Step 8
Replace the engine under cover, clips and bolts. Remove your car from the jack stands and take it for a drive to circulate the new transmission fluid. Listen for any abnormal sound and look for any leaks. If all checks out, you’re set for another 100,000 miles (or 60,000 miles or 30,000 miles) before your next automatic fluid exchange.
This is what brand new [amazon_link id=”B00CTUSEMU” target=”_blank” ]Toyota Automatic Transmission Fluid World Standard[/amazon_link] looks like (left) vs. the same fluid that has seen 119,629 miles of use (right):

The new fluid is bright red, transparent and very easy to pour. The old fluid is dark maroon, barely translucent and thick, almost like the consistency of heavy whipping cream. In 10 minutes, I drained a little less than 3 quarts of the old automatic transmission fluid, meaning I lost about ~0.6 quarts in the 120k miles and close to 6 years of ownership. I’ll do my next automatic transmission fluid change in the next 60,000 miles. And at the rate I’m going, that’ll be close to 8 years. The wife’s Prius c is approaching 75,000 miles, so I will be performing some major services on her car, including automatic transmission fluid exchange – so if you have a Prius c and are looking for DIY maintenance guides, stay tuned. This blog will be busy for the foreseeable weeks ahead.
To wrap up this service, transfer the old transmission fluid from the drain pan into the empty bottles and take it to a hazardous waste recycling center for proper disposal. Some local Auto Zones accept used motor oil and transmission fluid, so start there for convenience.
Between exchanging the automatic transmission fluid and replacing the PCV valve, the Prius drives brand new, like it drove off the dealer lot. The engine runs so much smoother and quieter. I will be keeping my eyes on the affect these services have on the Prius’ overall fuel efficiency.
Thanks for the info.
I would add to that you can safely just jack up the front of the car and not needed for the rear by parking on a slight incline. Park the car with front end lower than the rear so this way you need to only jack up the front.
MAKE SURE ITS A SMALL INCLINE NOTHING TO BIG!
I jack up the car with the tires just off ground. Make sure you have a leveler too.
Wow. Your tutorials are perfect. Thank you.
Can you post a link to purchase the body clips you have pictured? I see many on Amazon, but hard to tell if they are for the Prius.
There are several body clips involved, which are you referring to?
I’m referring to your pictures of the case containing a variety of clips. Are they specific to the Prius?
No, it’s not Prius-specific. It’s a collection of common Toyota body panel clips.
Also there is no filter for the 3rd gen prius?
No filter, just drain and fill.
What year is your 3rd gen prius?
Also my 2014 has almost 60k so if I change it now and reset the maintenance reminder then all other codes will be reset too?
My Prius is a 2012 Prius Four. Not sure what you mean by “all other codes” ? If you reset the maintenance reminder, then only the reminder goes away until the next 4,500 miles.
Thanks for the reply and GREAT POST!
For ex if a wheel balance code should come up at 60k mi but I reset the code at 58k mi then I will not be able to see any codes at all. So generally its not a good idea to reset codes before they show up since you wont have any clue on what might be displayed. Thanks
I think you may be confusing warning lights with the 5k maintenance reminder. They’re two separate indicators and resetting one will not affect the other.
OK one more question before I let you go. If I use it after market gasket that fits since it also has an inner diameter of 18mm but has a outer diameter of 26 mm vs the oem 23mm then will it work? Assuming when the gasket gets installed on the plug and then inserted to the pan there isnt a slot/groove then the larger outter diameter should work?
I would never use a replacement gasket outside of the OEM spec. Gaskets create a tight seal for the parts it is installed between and using a gasket that is outside of recommendation is asking for trouble down the line.